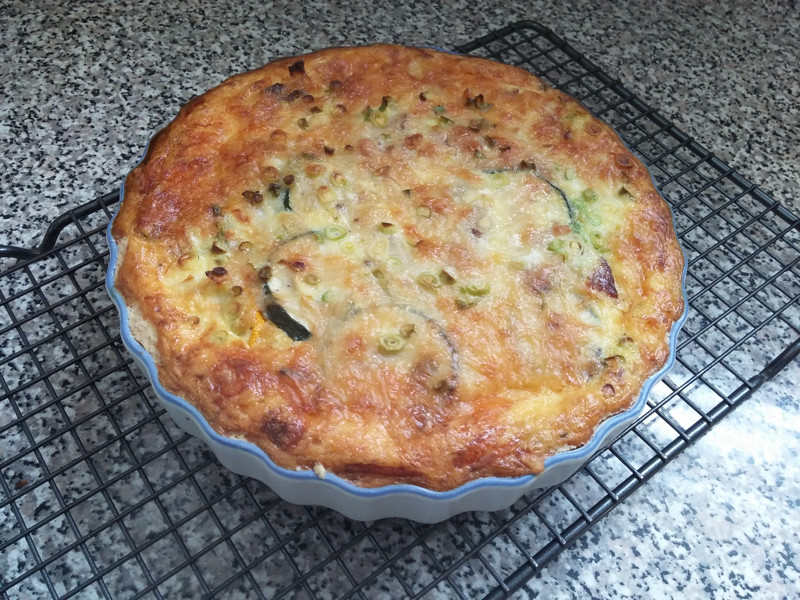
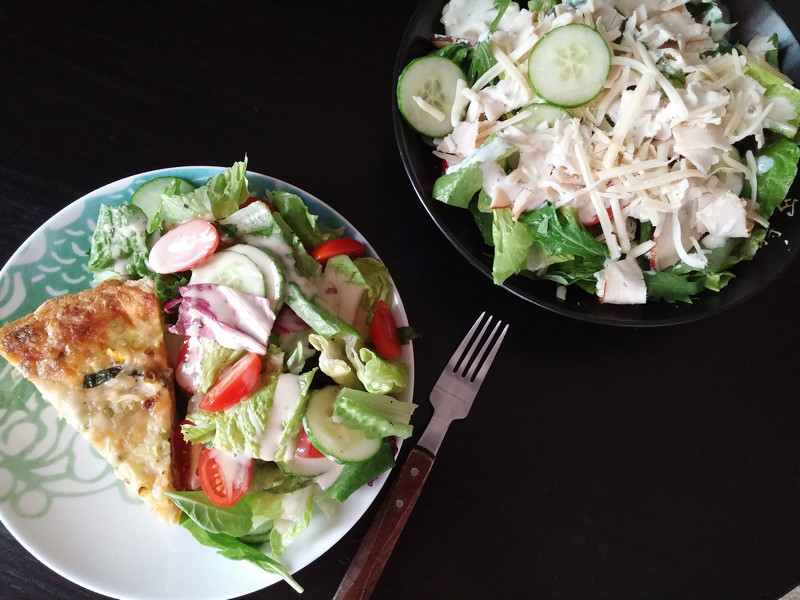
Smoked Gouda, Bacon, Spinach, & Red Pepper Quiche
Tuesday, April 4

Around here, we really love quiche. It's just one of those things that's super quick and easy to throw together, and even easier to heat up later in the week when you don't feel like putting any effort into cooking. I'm actually surprised I don't have more quiche recipes here... but it's probably because I use the same base each time and just toss in whatever ingredients I have laying around. I'm going to try to post more of the combinations though - just because the base is the same, doesn't mean you guys won't appreciate a new combination!
This particular one came together Saturday afternoon. I made and baked the crust in the morning, chopped up some bacon I had cooked earlier in the week, and then filled and baked the quiche later in the day, after running errands. Prepping everything ahead of time made it come together really quickly, and then dinner was ready in a jiffy. I used to buy frozen crusts from the store, but I'm kicking myself for it now. Homemade crusts are just so much tastier, they require only three ingredients (okay, four if you count salt), and they really take no time at all to put together. One of these days I'll make a proper recipe post for pie crust. In the meantime, just use whatever you have!

Smoked Gouda, Bacon, Spinach, & Red Pepper Quiche
- 1 pie crust, store-bought or homemade
- 1/2-pound thick-cut bacon
- 1 small yellow onion
- 1 small red pepper
- 1 big handful baby spinach
- 1 cup grated smoked gouda
- 6 large eggs
- 1 cup whole milk
- salt and pepper
Preheat the oven to 425°F.
Line a 9" pie plate with your crust, trimming or folding in the edges to your liking. Prick the bottom of the crust a few times with a fork, and freeze the crust for about half an hour. Then par-bake the crust in the oven for about 8-10 minutes, pricking with a fork again if the center has started to bubble up. If the sides of the crust have shrunk, just use a spatula to gently flatten them back up the side of the pan. Set the crust aside to cool.*
Turn the oven down to 350°F.
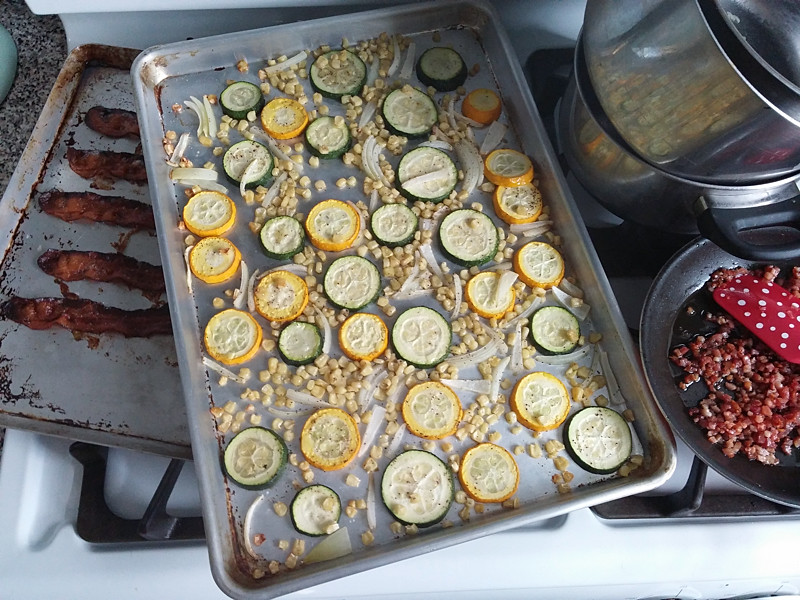
Lay the bacon out on a sheet pan, placing the slices side-by-side. Bake for about 18-20 minutes, or until the bacon is cooked through but not dark. Drain the grease from the pan, (I usually fill a small bowl with it, refrigerate it, and then spoon it into the trash later; you can also reuse it for cooking!), and set the bacon aside to cool. Once cool, dice the bacon and set aside.*
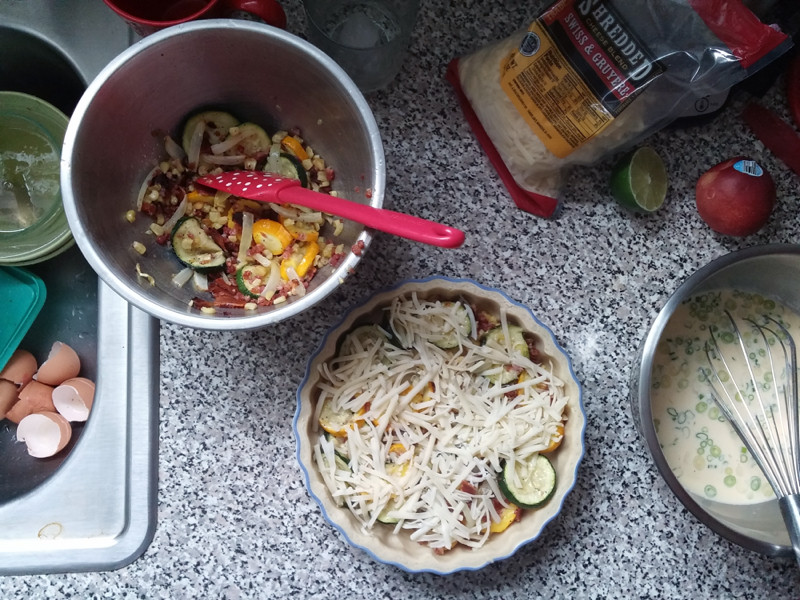
Chop the onion and red pepper - you can go the large dice route, or chop them slightly longer like I did. In a bowl, combine the chopped onion and pepper, spinach, diced bacon, and the smoked gouda. Mix everything together with your hands, then pour it all out into your par-baked crust. Flatten everything down so that it doesn't surpass the top edge of the crust.
In that now empty bowl, whisk the eggs and milk together until smooth. Season with salt and pepper to your liking. Pour the mixture over the rest of the ingredients, and carefully place your pie plate in the oven. Bake for 35-40 minutes, or until the filling doesn't jiggle and looks set. Allow to cool slightly before cutting, and enjoy!
* The crust and bacon can both be baked ahead of time. I usually buy a whole pound of bacon and bake it off, then use it throughout the week as needed. And the crust can be made a few hours in advance too. Then all you have to do later is get all the veggies ready, whisk up the eggs and milk, and you're all set!
Also worth noting: I rarely eat the quiche straight out of the oven. I find it much easier to slice later, so I'll usually make it in the morning in anticipation of reheating it for dinner later. Letting it sit really allows the filling to set completely. Leftover quiche keeps well in an airtight container in the fridge, and can be reheated in the oven at 350°F for 15-20 minutes.