Contributors

Search This Blog

Showing posts with label cookies. Show all posts

Best Ever Chocolate Chip Cookies

Saturday, November 19
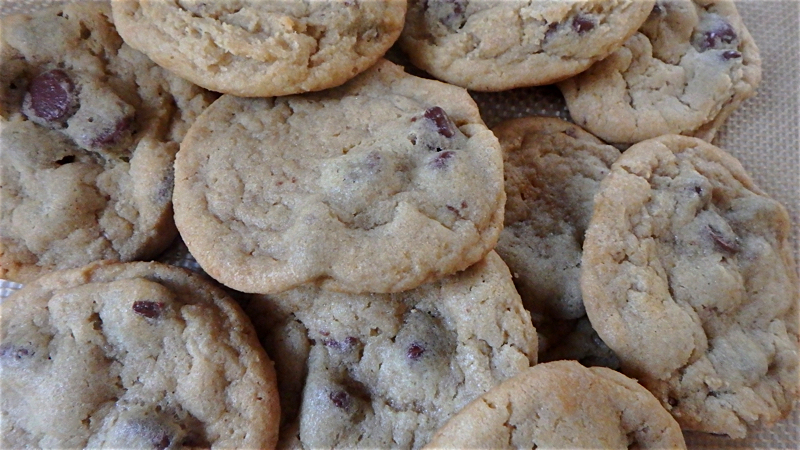

As a baker, the question I get asked most often is, "What's your favorite thing to bake?". Well, the answer is quite simple, really... my favorite thing to bake is my favorite thing to eat! I'm pretty easy to please when it comes to sweet treats, mostly because I'm really not that into sweet treats. (Yep, I said it.) Don't get me wrong, I like a good breakfast pastry every now and then, but when it comes to desserts and snacky things? I'm satisfied with a handful of fruit, or a few pieces of a chocolate bar. But, I also love a good cookie... they're simple, and quick to make, and I don't feel toooooo bad eating a handful of them. So a simple batter, with some pieces of chocolate scattered throughout - that's my favorite thing to bake!

While I was working on the new blog layout, I realized that my recipe for chocolate chip cookies is kind of outdated! I've tweaked it a bit since that was posted, and since it's a weekly staple in our house, I thought I should do you all a favor and give you the updated recipe. The old one is good too, but I think the new one is better. The major differences are - a higher baking temperature, a little bit more flour, and homemade brown sugar. Yeahhhhhhhh.
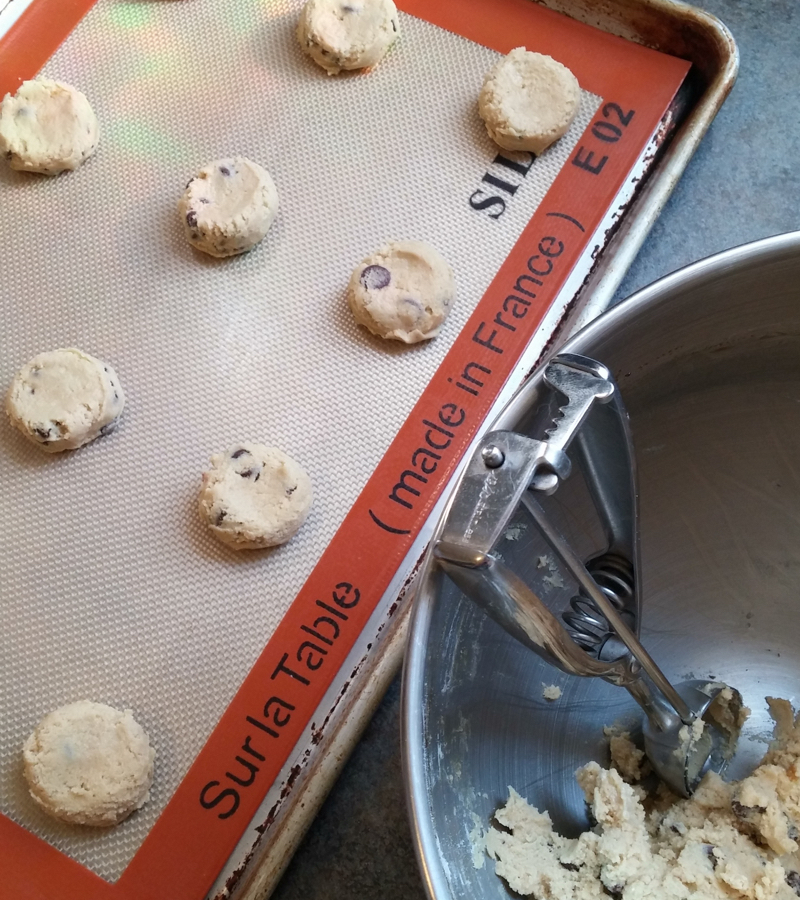

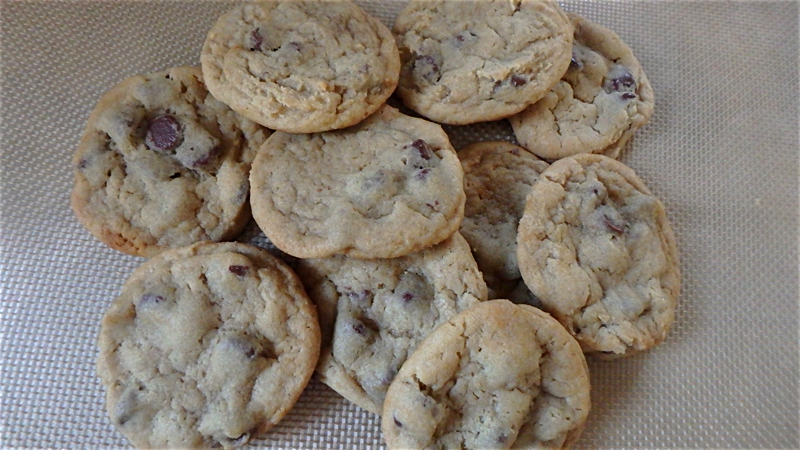
I was telling Shawn this morning that I make some kick-ass recipes, but I am not a food photographer. I really just shudder at the thought of staging food for the sake of photography - there's nothing at all wrong with food photography! I'm amazed by the photos other people take for their recipe posts, but the whole set up is just not my idea of a good time. And this has kept me from posting as many recipes as I would like to. I feel like every year I make a grand statement that I'm going to post more recipes, and every year I fall flat because my pictures just aren't good enough. You know what? I have to get over that. So, I'm not going to go out and buy a bunch of plates, napkins, and utensils to make my photos fancier, so what? I feel like there's kind of an appeal to just seeing a big pile of cookies on a plate, or dinner rolls still cooling on the pan they were baked on. My photos may not be anything special, but you can bet your ass the recipes that accompany them are well worth making!

Best Ever Chocolate Chip Cookies

  • 1/2 cup (1 stick) unsalted butter, room temperature
  • 1 cup homemade* brown sugar
  • 1 large egg, room temperature
  • 1/2 teaspoon vanilla extract
  • 1 & 1/2 cups all purpose flour
  • 1/2 teaspoon baking soda
  • 1/4 teaspoon salt
  • 1/2 cup milk chocolate chips
  • 1/2 cup semisweet chocolate chips

Preheat your oven to 350°F and line two baking sheets with parchment paper.
Beat the butter and brown sugar together until fluffy and pale yellow in color.
Add the egg and vanilla extract, mix until fully combined.
Whisk together the flour, baking soda, and salt, then mix those into the batter until just combined.
Mix in the chocolate chips.
Scoop dough into 2-tablespoon sized balls, flatten them slightly with your palm, and place them in rows about 2 inches apart on your prepared sheet pans. I usually fit 15 on each of my pans.
Bake for 12 minutes - well, that's the magic number with our current oven. Do a test batch, and adjust the time as needed if you want them more or less crispy. I judge by color, so I look for a pale golden brown and then I pull 'em. Let them cool on the sheet pan for a few minutes before transferring them to a cooling rack... or straight into your mouth.

The cookies keep well over night when stored in an airtight container, though honestly, if you have any left over, you're really not living life correctly.


Wanna know a secret? The un-baked dough keeps really well in an airtight container stored in the fridge. When you're ready to bake 'em, just set up your sheet pans and let the dough come to room temperature while your oven preheats, then bake as directed. If you're like us, you'll just have a constant batch of cookie dough on hand for those days when you feel like baking a few off on a whim....


* You don't have to use homemade brown sugar... but it's so easy to make, so why wouldn't you?!
Here's how you do it: Combine 1 cup of white sugar with 2 tablespoons of molasses, and let your mixer/hand beaters/whatever beat the two together until next thing you know, you're looking at beautiful fluffy brown sugar. If you want darker brown sugar, add a touch more molasses. Lighter brown sugar? Well, you'll have to start over for that one ;) And that's it! You can even make a larger batch ahead of time; just store it in an airtight container and give it a shake before you use it. I don't buy brown sugar anymore unless I'm in a pinch, or need a ton of it!


Read more...

Iced Key Lime Pie Fossil Cookies

Wednesday, February 4


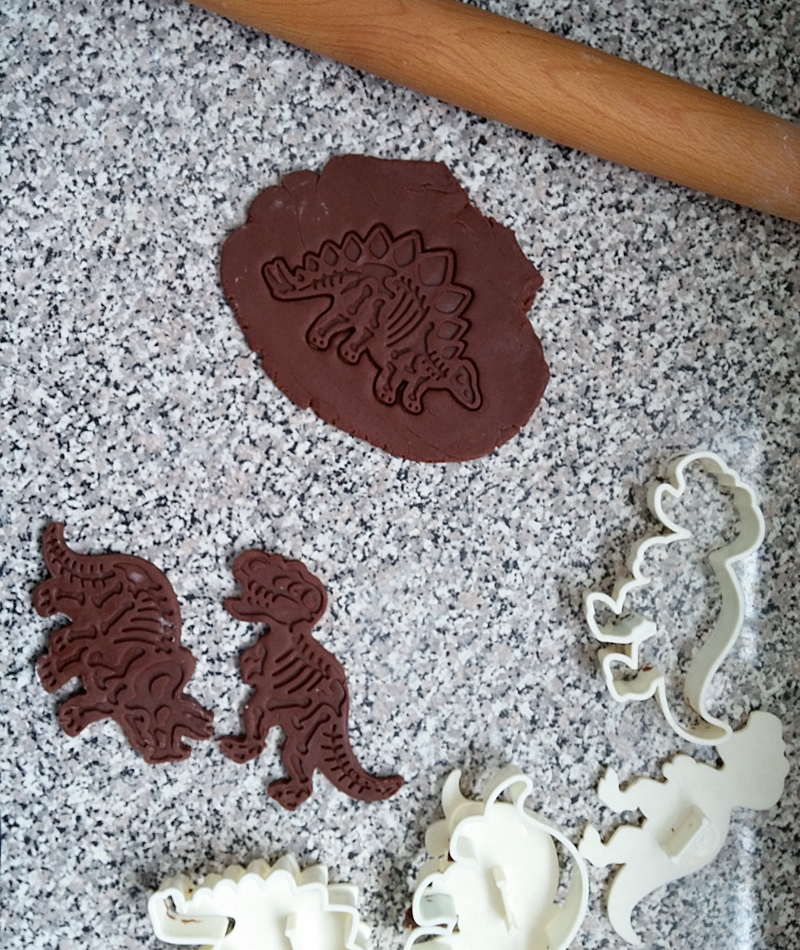
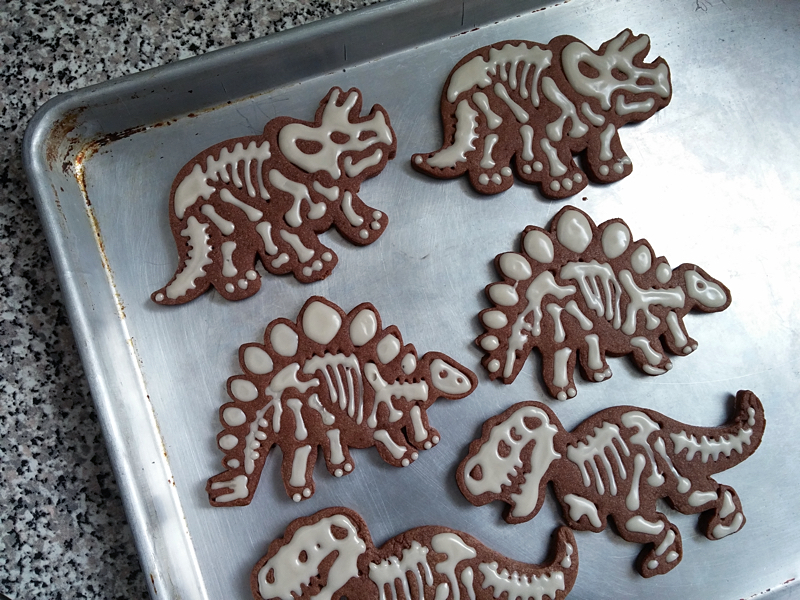
I have some awesome cookies to share today! Well, I'm sharing the recipe... because cookies can't be shared through the internet... yet. (Perhaps they're working on that?!) My parents got me these amazing dinosaur cookie cutters for Christmas. I'm not sure where they bought them, but I tracked them down for you. (You're welcome.) Of course I had to find the perfect recipe...


...something that would puff up ever so slightly without spreading, at risk of losing the shape of the cutters. Something that would be solid enough to hold in your hand, and be topped with icing. My first thought was sugar cookies, but Shawn does not like sugar cookies, so even though I could easily eat a whole batch myself, I thought I'd be nice and make something to share. Then my mind went to gingerbread cookies, because those also fit the bill. But I wasn't in the mood for gingerbread...


...so I looked to the one person whose recipes have never failed me. More specifically, I looked in her book first. And there, in the sweets section, was just the recipe I needed! I would share that version here today, because that's the version pictured here... but I'm not going to, because Deb's book is awesome and I encourage you to buy a copy for yourself.

Instead, here's a tweaked version of the recipe that I came up with at Shawn's brilliant suggestion. He took one bite of a cookie and amidst eating it said something about "oohmneffghad key lime pie mmshnfgah...", and these iced key lime pie fossil cookies were born. Of course, you don't need dinosaur cookie cutters to make this recipe... but they're highly recommended if only for entertainment value!


Iced Key Lime Pie Fossil Cookies

adapted from The Smitten Kitchen Cookbook

for cookies:
1 1/2 cups all purpose flour
1/3 cup unsweetened cocoa powder
1/2 teaspoon cinnamon
1/4 teaspoon salt
1/4 teaspoon baking powder
zest of one lime
8 tablespoons (1 stick) unsalted butter
3/4 cups sugar
1 large egg
1/2 teaspoon vanilla extract

for icing:
1 cup powdered sugar, sifted
1 tablespoon lime juice

- Whisk the flour, cocoa powder, cinnamon, salt, baking powder, and lime zest in a bowl and set aside. Beat the butter and sugar together in a mixer or with hand beaters until light and fluffy. Add the egg and the vanilla extract. Add the dry ingredients in gradually, until combined. Gather the dough into a ball, flatten, and wrap in plastic wrap. Refrigerate until mostly firm; about an hour.
- Preheat the oven to 350 degrees. Roll the cookie dough out to about 1/4 inch thick on a lightly floured surface. Cut into desired shapes and bake on a parchment lined cookie sheet for approximately 10 minutes, until the edges are firm and the centers are slightly puffed. Let the pan cool on a wire rack.
- While the cookies are cooling, make your icing by whisking the powdered sugar and lime juice together until smooth. Add more liquid if the icing is too thick, or more powdered sugar if it's too loose. Once the cookies are cool, use a spoon to drizzle icing on top of the cookies.
- Enjoy!


Let me know if you make these, or if you know of any other awesome cookie cutters!

Read more...

Holiday Cookies

Wednesday, December 10

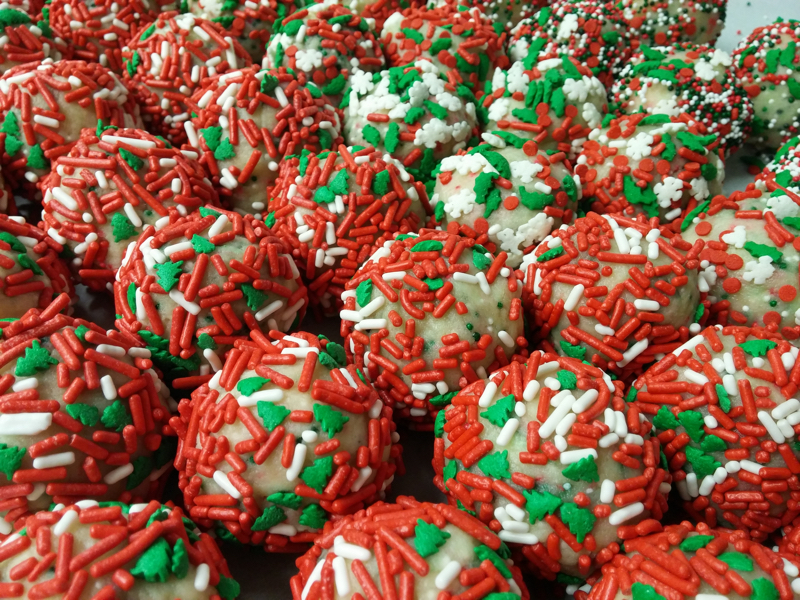
Every year I say I'm going to make a ton of holiday cookies and give them out to everyone I know, and every year I end up just making my staple chocolate chips and oatmeal raisins and just give them out to a few family members. This year though, I would really like to go all out and make a larger assortment of festive cookies. So here's my question for you...


Would anyone be interested in buying holiday cookies?

The assortment would include chocolate chip cookies, rolled sugar cookies, jam thumbprint cookies, and a few other cookies of my choosing! I would have to calculate the cost of shipping, but I'm thinking I can probably do a small tin (a dozen or so cookies) for about $15 or $20. I can figure out the specifics for a more accurate number, but I just wanted to know if anyone would be interested first. I can ship to anywhere in the U.S.!

Please leave a comment if you'd be interested in purchasing some cookies- whether for you or for someone else! They would be shipped in a festive tin inside a padded box; perfect for gift giving! If enough people are interested, I'll figure out the details and be in touch!

Read more...

Chewy Oatmeal Raisin Cookies

Tuesday, May 24

At work we recently started carrying some gluten-free muffins from a local gluten-free bakery. Before we decided to order, the baker gave us a few samples of various baked goods to try. Lets just say, it was very impressive. The coffee cake melts on your tongue and the muffins are moist and sweet like you wouldn't expect. What really made my mouth water were the oatmeal raisin cookies - they were chewy yet crunchy and they contained the perfect amount of raisins, with a light hint of cinnamon. Absolutely delicious!

After thinking about chewy delicious oatmeal cookies every day since, I finally came up with my own. Here is my very non-gluten-free recipe for chewy oatmeal raisin cookies:


Chewy Oatmeal Raisin Cookies

1/2 cup all-purpose flour
1/2 cup whole wheat flour
1/2 teaspoon cinnamon
1/2 teaspoon baking soda
1/2 teaspoon salt
2 cups rolled oats
1 cup raisins
10 tablespoons butter
1 cup brown sugar
1 egg
1/2 teaspoon vanilla extract

- Preheat the oven to 350 degrees.
- In a small bowl combine both flours, cinnamon, baking soda, and salt.
- In the bowl of your stand mixer beat the butter and brown sugar together.
- Add the egg and vanilla extract to the butter/sugar mixture and beat until combined.
- Slowly add the dry ingredients in, followed by the oats and raisins.
- Using a spoon or a cookie scoop if you have one, place balls of dough 1" apart onto your cookie sheet and flatten them down with your fingers.
- Bake the cookies 12 - 15 minutes, until the edges are golden brown.
- Let them cool on the cookie sheet for at least 5 minutes before moving them to a cooling rack to cool completely.
- Enjoy!


Read more...

Oatmeal Chocolate Chip Cookies

Monday, February 28

Since I make my money making pastries and interacting with customers over coffee, I get a lot of questions about the yummy baked things I make. But there's one question I hear more often than others: "How do you keep yourself from eating everything you make?" The answer is simple... when it comes to pastries, I have one weakness: cookies.

Indulgence in things like decadent cakes, pies, brownies aside, there is just nothing better than a freshly baked, still warm from the oven, ooey, gooey, chocolate chip cookie. I love making cookies because they're so versatile... you can tweak each ingredient for a varied effect and texture. One day I'd like to open up a bakery in a cozy place where we only serve cookies straight out of the oven... the only way they should be served.

These oatmeal cookies are a take on my beloved chocolate chip cookies - with a little extra brown sugar for some chew, and some oats and cereal for a little crunch.

Yummy!


Oatmeal Chocolate Chip Cookies


Ingredients:
1 1/4 cups flour
1/2 cup rolled oats
1/2 teaspoon baking soda
1/4 teaspoon salt

1/2 cup unsalted butter
1/2 cup sugar
3/4 cup brown sugar

1 egg
1/2 teaspoon vanilla extract

1/2 cup chocolate chunks
1/4 cup corn flakes

- Preheat your oven to 325 degrees Fahrenheit.
- Beat together the butter and both sugars until light in color and creamy in texture.
- Add in the egg and vanilla and beat until smooth.
- Mix all of the dry ingredients together in a separate bowl and then add them to the wet ingredients slowly, until combined.
- Add in the chocolate chunks and corn flakes, plus any other ingredients you have around (suggestions: coconut flakes, nuts, dried fruit, other cereals... be creative!).
- Scoop the dough out onto your cookie sheet and bake for about 17 minutes, or until the tops look cracked and golden.
- Enjoy!


Read more...

The Real Double-Stuff

Wednesday, February 23

Remember the other day when I teased you with this picture?


Well today I'll be nice and share the recipe with you. I don't think I need to say much about these cookies, I mean, it's an oreo-stuffed chocolate chip cookie, what more is there really to say?

'Oreo' Stuffed Chocolate Chip Cookies


Ingredients:
1 stick of butter, at room temperature
1/2 cup of sugar
3/4 cup of brown sugar

2 eggs
1/2 teaspoon vanilla extract

1 1/2 cups of all-purpose flour
1/2 teaspoon baking soda
1/4 teaspoon salt

1/2 cup of finely chopped chocolate (mini chocolate chips would also work well)
12-15 oreos, or similar sandwich cookie varieties.


- Preheat your oven to 350 degrees.
- Cream the butter and sugars together until smooth.
- Add the eggs one at a time until incorporated, then the vanilla extract.
- Combine the flour, baking soda, and salt in a separate bowl, then add all these dry ingredients to your wet ones until thoroughly combined.
- Stir in the chocolate chips, then form your dough into balls. I use my cookie scoop to make sure they're even, but you can use a spoon and your eyes to make balls that are about 1 tablespoon in size. Once you have all of your cookie dough balled-up, the fun starts!
- Take an oreo and use two balls of cookie dough to cover it; the best method I found was to put one ball of dough on top of the oreo and one on the bottom, then gently flatten everything between your palms and work/mold the dough down around the oreo cookie. After doing a few of them I felt like I was working with play-doh... and you really can treat it as such! Just work the dough around the cookie however you need to make sure the oreo is fully covered.
- Arrange your super cookies about an inch apart on your cookie sheet and bake them for 16 minutes, or until the cookie dough is golden brown and cracked on top.
- Let the cookies cool on the sheet pan until you deem them solid enough to move to a cooling rack, then let them cool completely. These cookies taste great warm, but they taste even better if you have the patience to let them cool down completely. (The oreos are more intact once the cookie is completely cool!)
- Enjoy!


Super Cookie: deconstructed


If anyone's curious, I used Trader Joes' Joe Joes instead of Oreos. But I'm sure you're not surprised.

Read more...

Peanut Butter & Honey Cookies

Thursday, January 27

Two recipes in one week??!! This is a new one for us. But I promised you at least one a week for the remainder of the year, and I didn't hold up my end of the deal last week, so now you get two this week!


Remember that peanut flour I bought back in October? Well, after one or two attempts at incorporating it into my chocolate chip cookie recipe, the bag just sat on the shelf for a while. So the other day after stumbling upon it again I decided to come up with a cookie recipe that would highlight the flour in all of it's peanutty glory. These cookies were soft but not crumbly and not overwhelmingly sweet... exactly what I was looking for.


Peanut Butter & Honey Cookies


Ingredients:
1 cup peanut flour
1/2 cup all-purpose flour
1/2 teaspoon baking soda
1/4 teaspoon salt

6 tablespoons unsalted butter
2 tablespoons peanut butter
1/2 cup sugar
1/8 cup honey

1 egg
1/2 teaspoon vanilla extract

- Preheat the oven to 350 degrees.
- Combine both flours, baking soda, and salt in a small bowl and set aside.
- In a large bowl, beat together the butter, peanut butter, sugar, and honey.
- One the mixture is smooth, beat in the egg and vanilla extract.
- Then mix the dry ingredients in slowly.
- Form the dough into balls and then squash them down into discs, press them with a fork if desired.
- Set cookies about 1" apart on a cookie sheet (these don't really spread, so you can keep them close to each other) and bake them for 10 minutes, or until their bottoms are a nice golden color.
- Let them cool for a few minutes before transferring them to a cooling rack.

Read more...

The only cookie recipe you need!

Tuesday, August 24


Today I'm going to share one of the best recipes in the world with you! Ok, perhaps that's a bit of a stretch, but chocolate chip cookies are pretty damn appreciated in this world and I cherish this recipe greatly. It took years of recipe tweaking but I finally found THE chocolate chip cookie recipe. This dough makes a fantastic base for other types of cookies too - it's easily tweak-able! I've made coconut cookies, peanut butter cookies, and oatmeal cookies from this same base. But the chocolate chip cookie is still my favorite.

But before I show you how to make cookies - I'm going to talk up some chocolate!


When it comes to chocolate, Trader Joe's Pound Plus bars are my favorite! They're only $4.99 for 17.6 oz of Belgian chocolate goodness! The semi-sweet bars are perfect for brownies or recipes where chocolate is the prominent ingredient, and the dark chocolate bars are what I chop up for cookies. Personally, I prefer fresh chocolate chunks over bagged waxy chocolate chips any day! If you're lucky enough to have a Trader Joe's near you, go buy some chocolate now!!!

Ok, time for some cookies. How do you get this....


... from stuff like this?


I'll show you!


Mix mix mix. If you're lucky enough to have a mixer in your kitchen, then use the paddle attachment on that. Otherwise, make sure to build up some strong muscles! Working in a pastry kitchen for almost two years helped me become a strong whisker - but if you don't have that luxury either, then just do what I do and let your butter soften up a bit before attacking it with your spatula.


Before and after baking shots! If you make cookies fairly often, I recommend getting yourself a cookie scoop, it makes the bowl-to-sheet pan process a little easier, and you get uniform cookies every time! You can usually find them for a decent price at places like Home Goods; that's where I got mine. I usually bake off about a dozen cookies at a time and scoop up the rest into an airtight container that can sit in the fridge until the next time you want cookies. Which, in our house, is almost a daily practice...

Chocolate Chip Cookies


ingredients:
1/2 cup unsalted butter
1/2 cup granulated sugar
1/2 cup brown sugar

1 egg
1/2 teaspoon vanilla extract

1 1/4 cups all-purpose flour
1/4 teaspoon baking soda
pinch of salt

1 1/2 cups chocolate chips

- Start by preheating your oven to 325 degrees Fahrenheit and getting your dry ingredients ready: whisk together the flour, baking soda, and salt and set it aside.
- In another bowl, beat the butter and both sugars together until mixture is pale and fluffy.
- Add the egg and vanilla extract and mix until combined.
- Add your dry ingredients now and mix everything together until all the flour is incorporated.
- Now you have a delicious cookie dough base! At this point, you can add in whatever mix-ins you please. I went with the traditional chocolate chips (ahem, chunks), but you can really veer off and add whatever you're craving - nuts, candy, coconut, dried fruit, cereal, anything!
- Once you've mixed in everything you want to mix in, scoop little balls of dough out onto your sheet pan- leave about an inch of space between each- they will spread a bit! I usually fit about sixteen on my sheet pan.
- Bake them for 16 minutes, give or take a few depending on how your oven runs and how crispy you like your cookies.
- Let them cool on the pan for a few minutes before transferring them to a cooling rack.


Bake, and enjoy!


A happy baker!

Read more...

  © Blogger Template - Simple n' Sweet